Hello!

Xaudia offer microphone re-ribboning and repair services.
Showing posts with label rant. Show all posts

2011/11/25

The Devil's Own Multi-meter

I used to own a multi-meter, which I inherited from my Grandfather sometime back in the early 1990's. It was a nothing fancy, but had a function for quickly measuring the HFE value, which I found very useful.

Said meter died a few months ago. My newer multimeter lacked this function, so I bought a cheap meter on ebay to fill in the gap.

But it is the devil's multimeter. Whenever I turn it on, the display briefly flashes up the number '666' before reading zero. Here's a video....


Nothing is attached, and the number comes up regardless of the function selected.

Spooky!

2011/04/14

Strange things you find inside mics, part 2

A few months ago I wrote this blog post about the strange things that I had seen inside ribbon microphones. In those cases the 'strange things' in question were put in there deliberately by previous owners or techs trying to repair or improve the microphone.

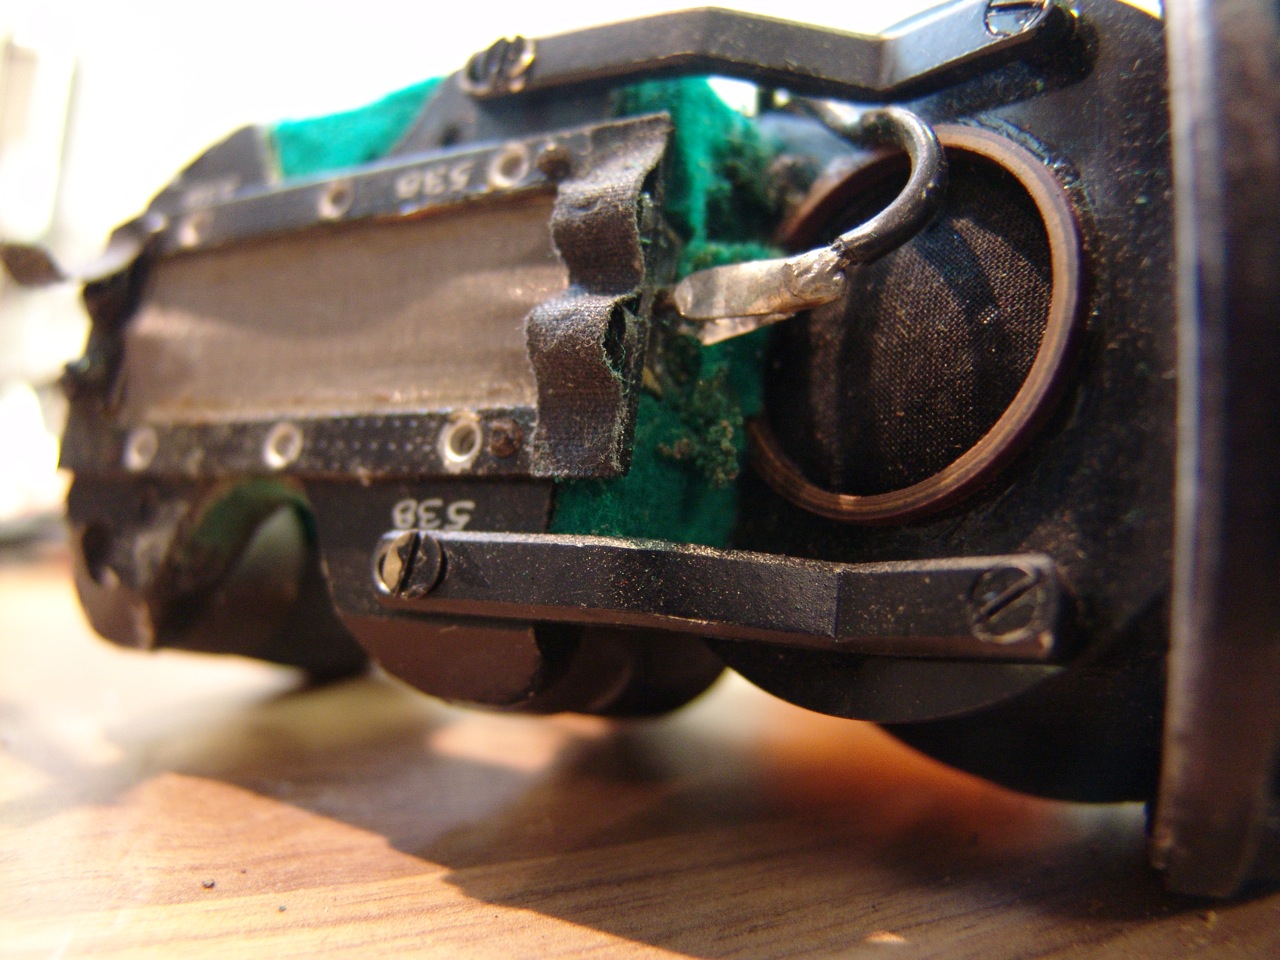
Since then I have come across a couple of microphones which contained even weirder things - insects!

Before modern foams, felted wool was widely used in microphones for shock mounts, wind shields and the like. Unfortunately, moths love this stuff too.

Here's an old STC4033. You can see the moth eggs on the lower block of green felt.


Worse still, one of the moths had become lodged behind the ribbon:


Moths also seem to like the wool lining and felt mounts on AKG D12s - here you can see the eggs and damage to the lining in the inside corner of the grill:


Anyway, I guess the lesson to be learned is that microphones should be stored in dry, clean places and not in the garage, or at the bottom of the wardrobe. 

:-D

(thanks to Steve Parry  )

2011/01/09

False Economy a.k.a. "I can't afford to buy cheap."

Here's a little lesson that I learned (again) recently. Buying cheap, used equipment can cost just as much, or more, than buying new.

RE20 microphone in the Xaudia studio
I recently found an ElectroVoice PL20 microphone for sale on a forum for $200, which translates as about £130. The PL20 is exactly the same (apart from the colour) as the much loved RE20, which is a perfect choice for recording drums, bass, vocals, brass and many other instruments. Considering that these microphones generally go for around £400 here in the UK, I thought I would grab a bargain for our studio. Even with transatlantic postage, duty, and maybe some small repairs, I should come out ahead of the game, right?

WRONG!

The first thing that arrived was a letter demanding a whopping payment of duty and handling for the import.

On unpacking I noticed that the microphone rattled - the capsule was loose. This is actually a common fault with these microphones - the foam disintegrates and the capsule becomes loose. Luckily, replacement foam is available for a small charge from Shuttlesound. I ordered a kit and it arrived the next day.

Time for surgery: Here is an excellent photo-journal showing how to open up an RE20.

The mic comes apart easily - you need to unscrew the XLR connector at the bottom (note the screw turns counter-intuitively), and unsolder it , then undo the hex nut behind it. This reveals the wiring which can be fed through the mic body so the capsule may be withdrawn.

Also remove the grill, which will unscrew once a small grub screw has been removed. On this mic the hexagonal hole had been stripped round, and so I had to carefully drill this out and re-tap the thread.

With the mic apart I unsoldered the capsule, cleaned out dirt and deteriorated foam, and then put it all back together again with the new foam for testing.

The capsule was no longer loose, but the mic still rattled! Something was broken inside the capsule assembly.

I took it apart again and took the top cover off the capsule. Inside I could see that the small black baffle behind the diaphragm had become unglued. This is not good - it can't be reached without removing the diaphragm, and this is like brain surgery.

With nothing to lose, I carefully unsoldered and removed the diaphragm with a scalpel, then re-glued the baffle and reversed the process, and tested. Sadly the 'repaired' capsule had low bass response. It was time to admit defeat and order a new capsule, which did indeed solve the problem. The mic is now back to full working order, and sounds just like the other RE20s.

Total cost:
'Bargain' microphone: £130
International postage: £25
Duty and handling £49!
New foam set + delivery + VAT: £23
New capsule + VAT: £167
+ a couple of hours ordering and fitting bits.

Total = £394

For reference,  Thomann.de sell a package for £399 which includes an RE20, a stand and 10M cable.

Lesson learned.... at least for now.

Oh, and the mic stand clip is missing....

2011/01/07

Strange things you find inside ribbon mics (part 1)

Microphone ribbons are generally made from very thin metal foil, and aluminium is the ideal material as it is very light but also very conductive. The output of the microphone is inversely proportional to mass, and so a thicker, heavier ribbon will give a lower output, and a thin light ribbon will be more sensitive. Many manufacturers use something typically around 0.0001 inch or 2 microns in thickness. The ribbon is also typically corrugated either along the full length to prevent lateral motion, or at the ends to give a 'piston' style of ribbon. Well, that is how it should be.

However, ultra-thin aluminium is hard to get hold of, and the non-specialist may be tempted to make repairs using materials that are more readily available. Here are some things I have found inside microphones masquerading as ribbons - needless to say they were all replaced with good quality aluminium foil of an appropriate thickness!

1. Cigarette Paper.

This microphone actually worked, to an extent! It at least made a sound. The ribbon was made from an old fag packet.
Cigarette packs used to come lined with paper-backed foil - I've never been a smoker so I don't really know why, but I imagine for freshness or something. The foil is thin and already textured - it just needs to be separated from the paper. Actually this last part seems to be optional, and sometimes bits of paper are still attached, making the ribbon heavy and noisy.

1.b I've heard that chewing gum wrappers were also used for redneck ribbons, if you want a minty fresh microphone.

1.c Here's a lovely example of cigarette paper being used for a ribbon in an old GEC microphone.


2. Kitchen Foil

Kitchen foil is easy to handle, yet much too thick to make a decent ribbon. But that doesn't stop people trying. This is a common ebay trick... the ribbon looks in good condition, but when the mic arrives the output is low and sounds crunchy.

3. Sweet Wrappers
Plastic coated foil or metallised plastic, like that found in sweet wrappers is an interesting innovation, but is generally too heavy and has too high a resistance to make a decent ribbon. Also the plastic doesn't conduct. This microphone gave almost no signal, and it isn't hard to see why.