

Tube modified Syncron microphone circuit, 6V regulated heater supply omitted.
The Syncron capsule operates happily between about 40V and 60V, and a simple voltage divider was used to supply the backplate with a suitable polarising voltage. As the capsule is cardioid only, the circuit can be made as simple as possible, and there is no need for a capacitor between the diaphragm and the tube grid.

With a little creative hacking I was able to reuse the circuit board to construct a valve circuit, which avoids damaging the microphone further. Although physically larger, the tube sits where the transistor was (I even used the same PCB pads as the FET), and there is room on the underside of the board for a couple of capacitors. An added bonus is that the original transformer is quite suitable for use in a tube circuit, and was rewired in 10:1 configuration. The rest of the circuit - 5 resistors and another cap - fit on the 'wrong' side of the board in the cavity below the capsule housing. Then it is a simple case of wiring the connector to the circuit and connecting the capsule, taking care not to damage the diaphragm.

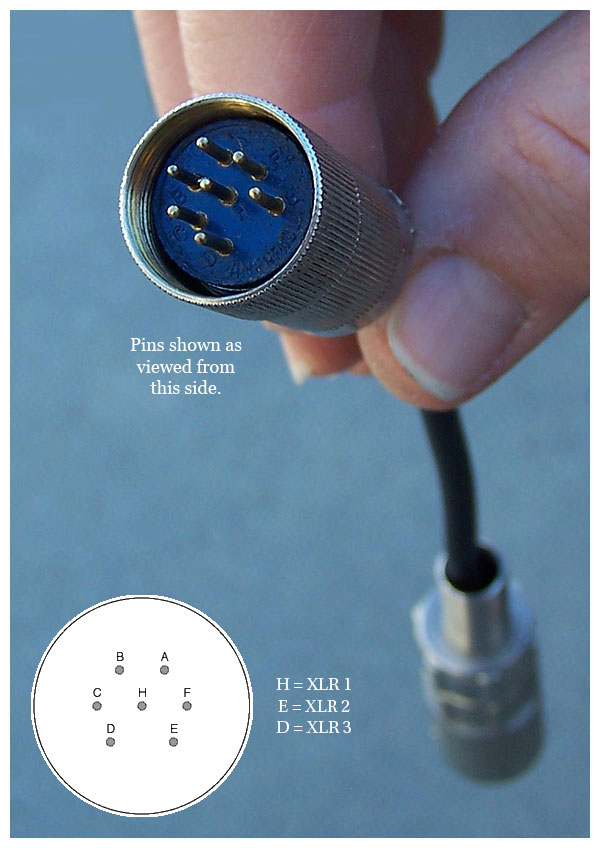
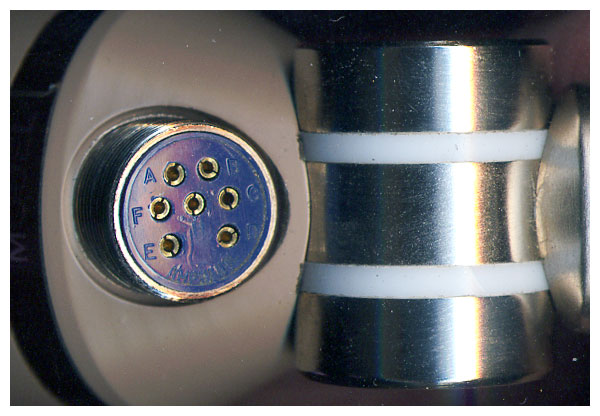
One thing to look out for with this arrangement is that the amphenol cable plug & connector on the microphone are the reverse of the normal gender, which means that there can be 110V DC on the exposed pins. Consequently care must be taken to connect the microphone before the power supply is turned on, otherwise a short sharp shock can happen. Of course this isn't really an acceptable acceptable solution from a safety point of view.
In practice the microphone works very nicely and is suitably quiet for recording vocals. We tracked some female vocals with it yesterday and it performed very well in that application.
Meanwhile, I have managed to track down some 22V batteries from Farnell, which should be suitable for the capsule polarisation, so I'll attempt to restore the second mic to its original state. More on that soon.
** With hindsight the 5840 may be a better bet as there is an internal connection between the cathode and grid 3. This allows you to cut off two of the leads, which means using up one less precious pad on the circuit board inside - space is tight!
**Readers familiar with the 'Royer' tube circuit will recognise the topology, although a few of the component values are different.
Xaudia blog post on phantom power for these mics.
Xaudia blog post on phantom power for these mics.

Hi!
ReplyDeleteNice article. Just bought the same mic from eBay. But being very non-technical I'm not capable to do the modifications you do, so I was wondering where you bought the batteries for this mic? I haven't received mine yet but I'm quite sure the batteries are long gone... :)
2re
Hello 2Re,
ReplyDeleteI saw the mic in ebay and it looked like a fair price.
Unfortunately I couldn't find a supply of batteries here in the UK, and in fact the batteries were still in place and quite corroded. That's why I ended up modifying the mics. Hopefully you'll have better luck where you are.
Do let me know if I can help further when you receive it, or drop me a message at xaudia.com
Stewart
Thanks, Stewart. Will let you know if I need some help when it arrive.
ReplyDeleteTore
Hi, could the mic circuit be adapted to run off of phantom power? Like a U87?
ReplyDeleteHi Ev. We have modified a couple for phantom power use, and there is a blog post about this....
ReplyDeleteSyncron phantom power
:)